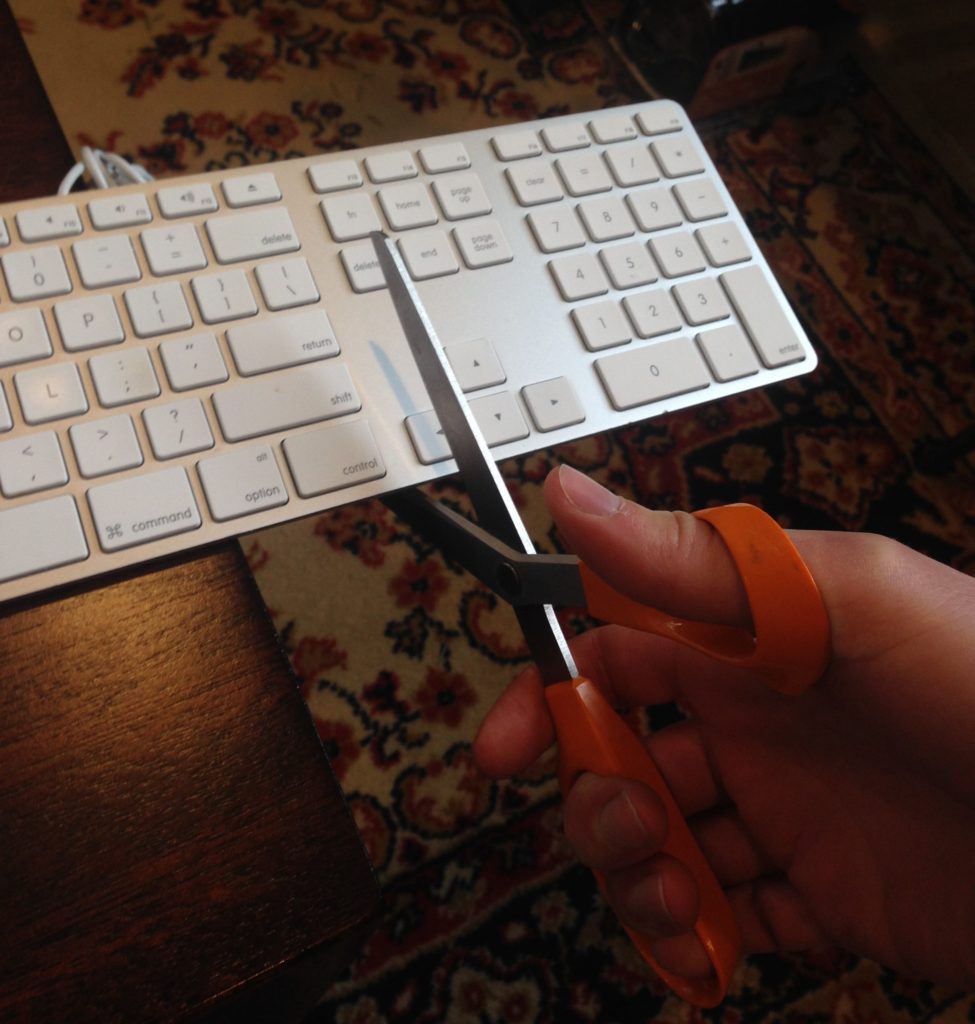
Sometimes you need dedicated navigation keys and a numeric keypad. Other times you’d prefer a more compact layout that places the mouse and letter keys closer to the center of your posture. Having struggled with this myself, I thought I’d write a quick tutorial that shows my method for dealing with this problem.
Supplies
Apple Extended Keyboard
Scissors
Step 1: Trim
Step 2: Enjoy
I’ll follow up soon with another guide for shrinking the arrow keys down and attaching them to the new, smaller keyboard
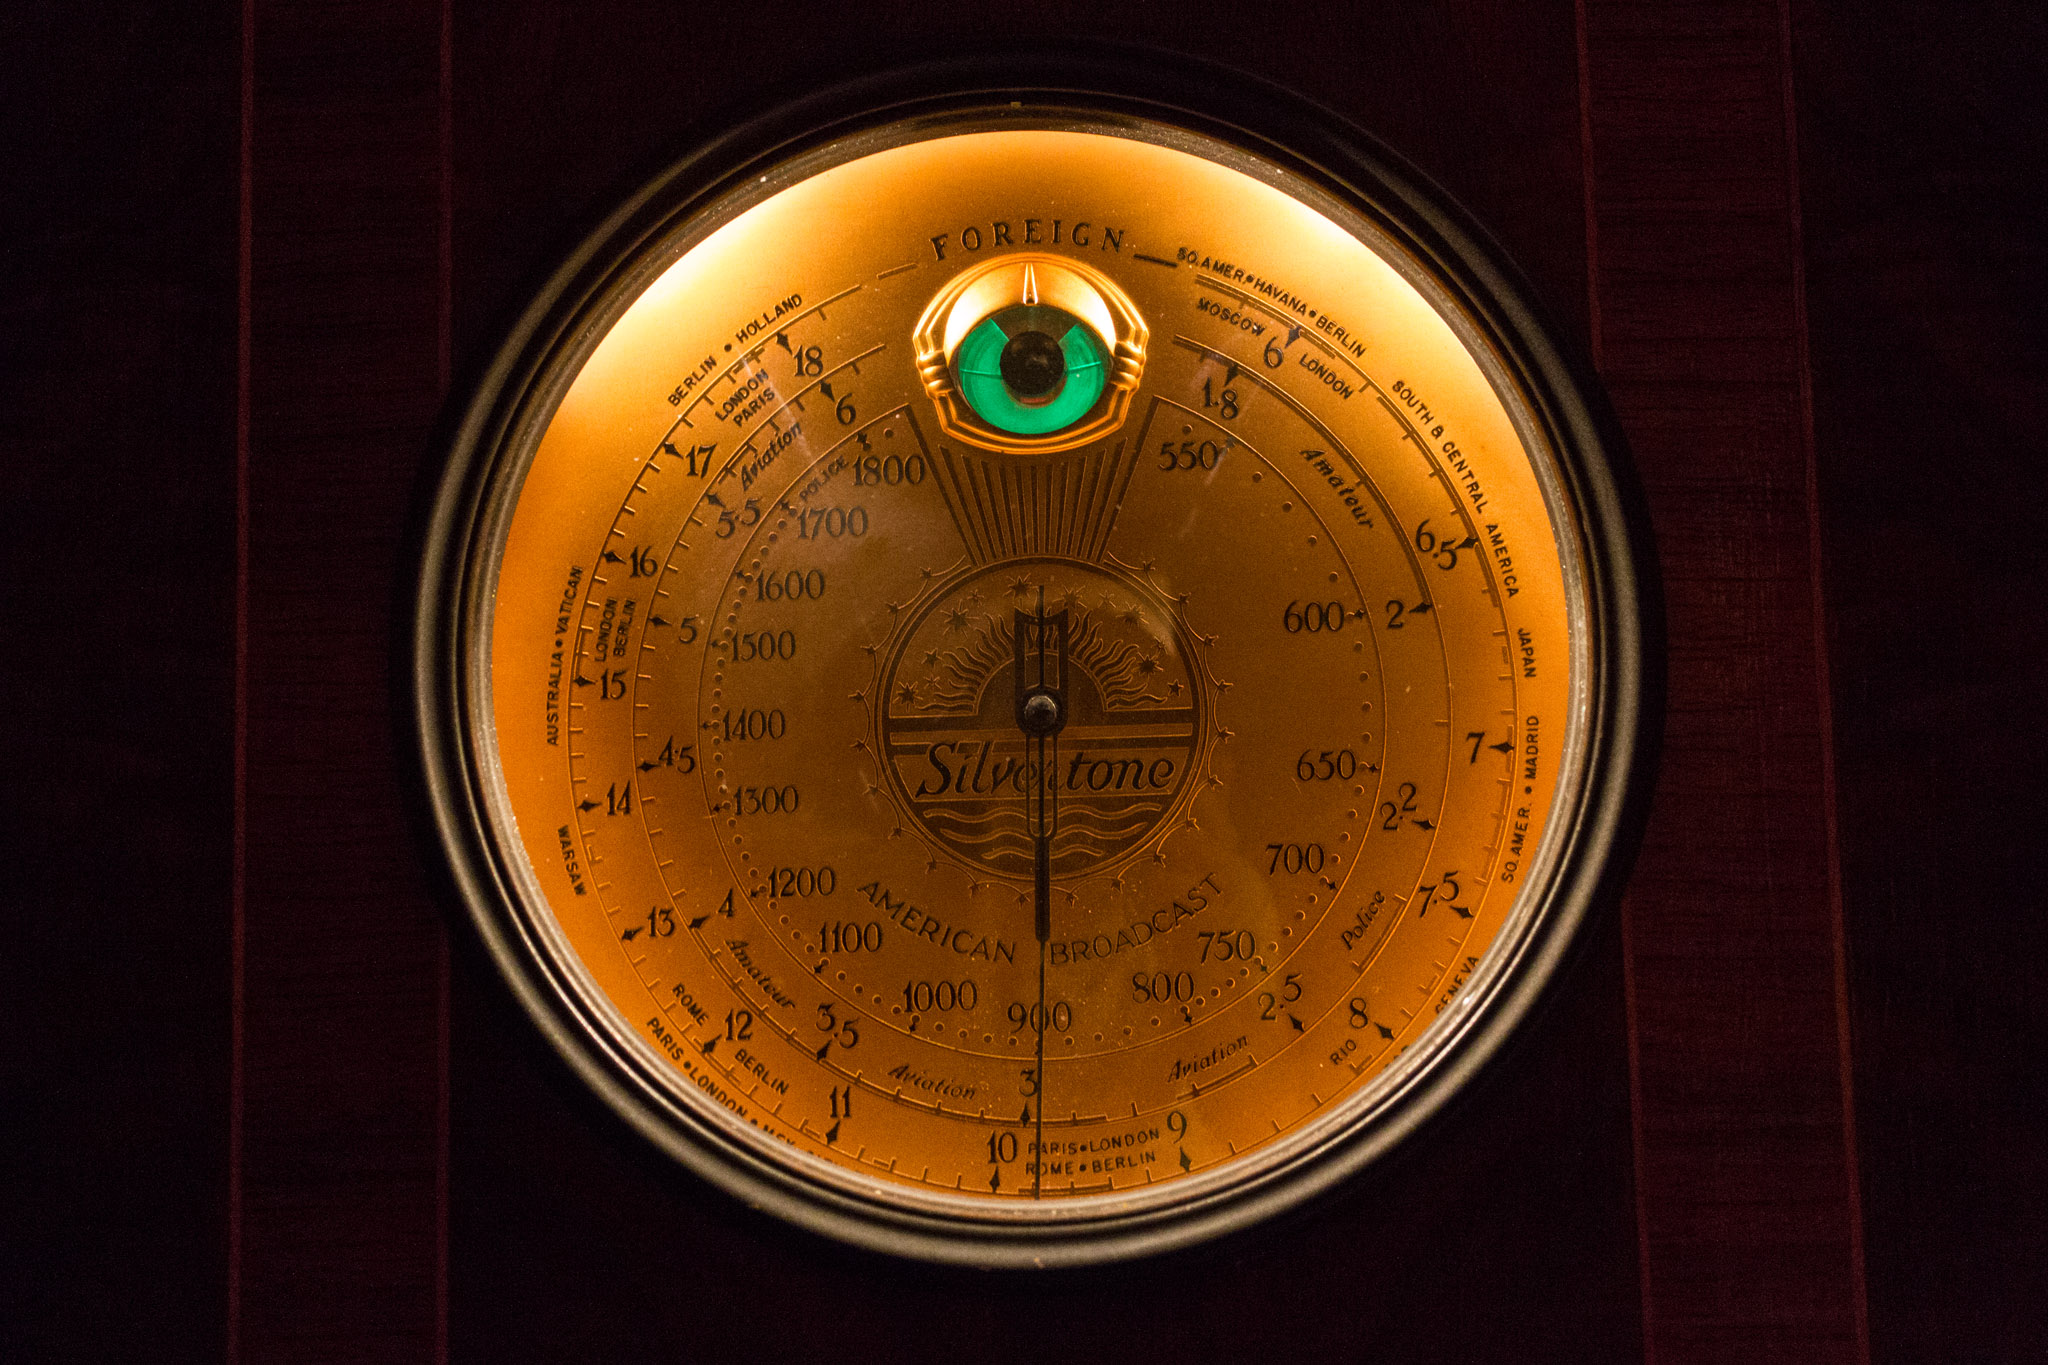
When I was growing up, my family had an old console radio that would move around the house to occupy different spots. The design was really interesting with an art deco dial listing all of the international bands that it could receive, and a ‘magic eye’ that illuminated when the radio was powered up. Unfortunately it only produced a deep hum when turned on. I never gave it too much extra thought until I lived with my friends Adrian and Lynda in Australia.
Adrian tinkering with Monica’s birthday gift in Newcastle Australia.
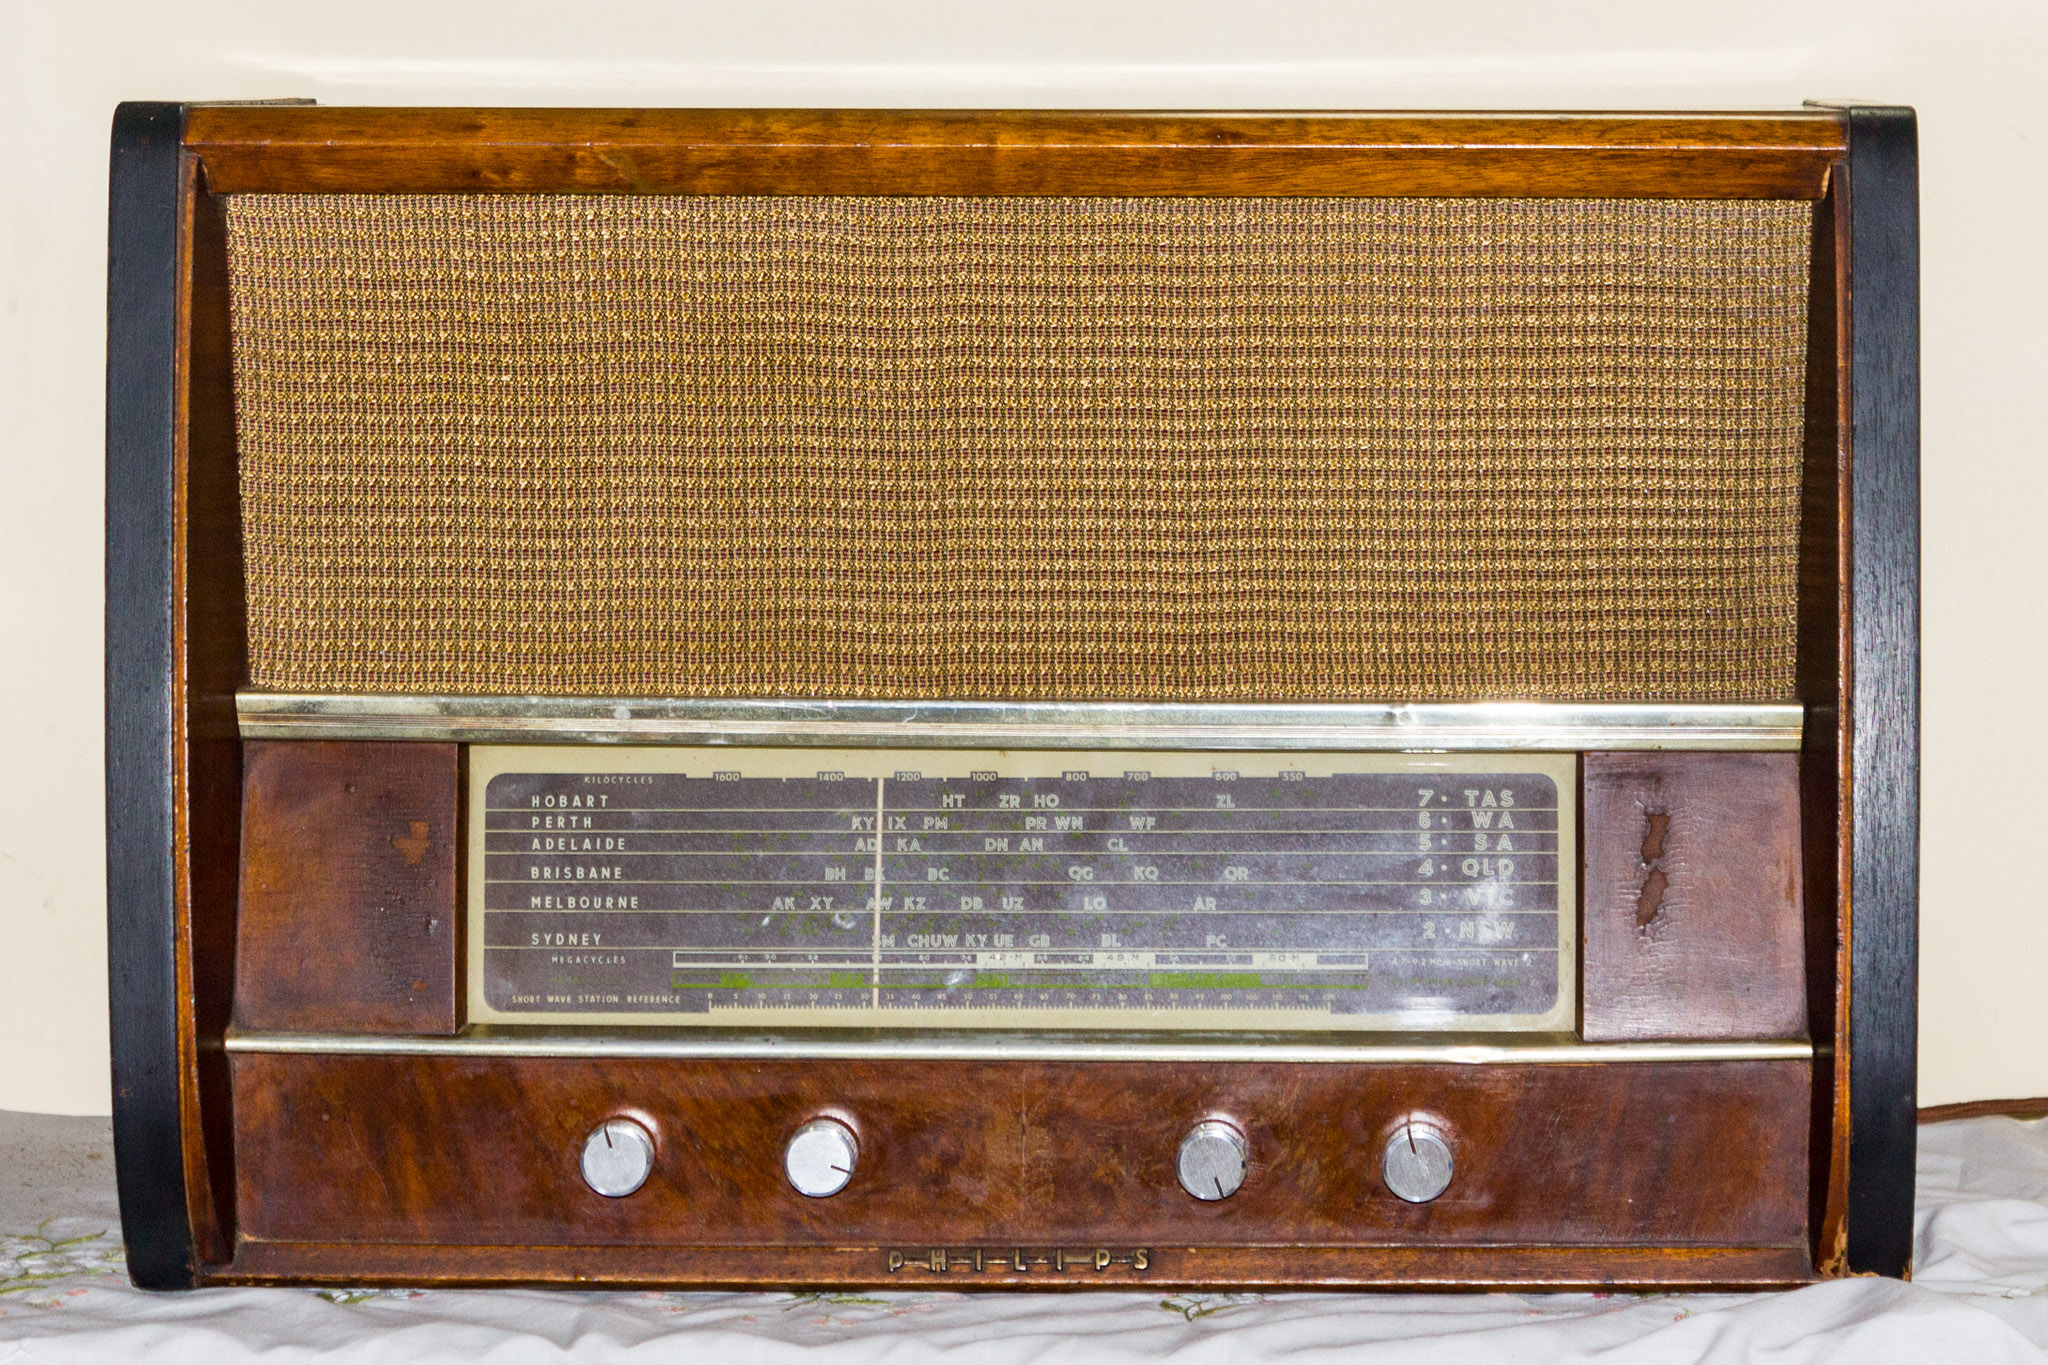
Adrian was keen to give our friend Monica a cool gift for her birthday, so he found an old 1930’s radio at an op shop with the plan of modifying it so that she could stream music to it from her phone. Because the radio was still functional, he wanted to utilize its original electronics rather than gutting the mechanics and putting modern hardware inside the wooden shell. He’d read about a method that could be used reliably with these types of radios, to inject a new audio signal at the volume potentiometer. This allows the radio to use all of its original amplification, but with a clean audio signal coming from whatever device is attached to it.
He ordered a little bluetooth audio receiver off the internet, connected it to the potentiometer, and Monica received a tube radio for her birthday that she could control from her phone.
Adrian’s finished radio, ready to give to Monica
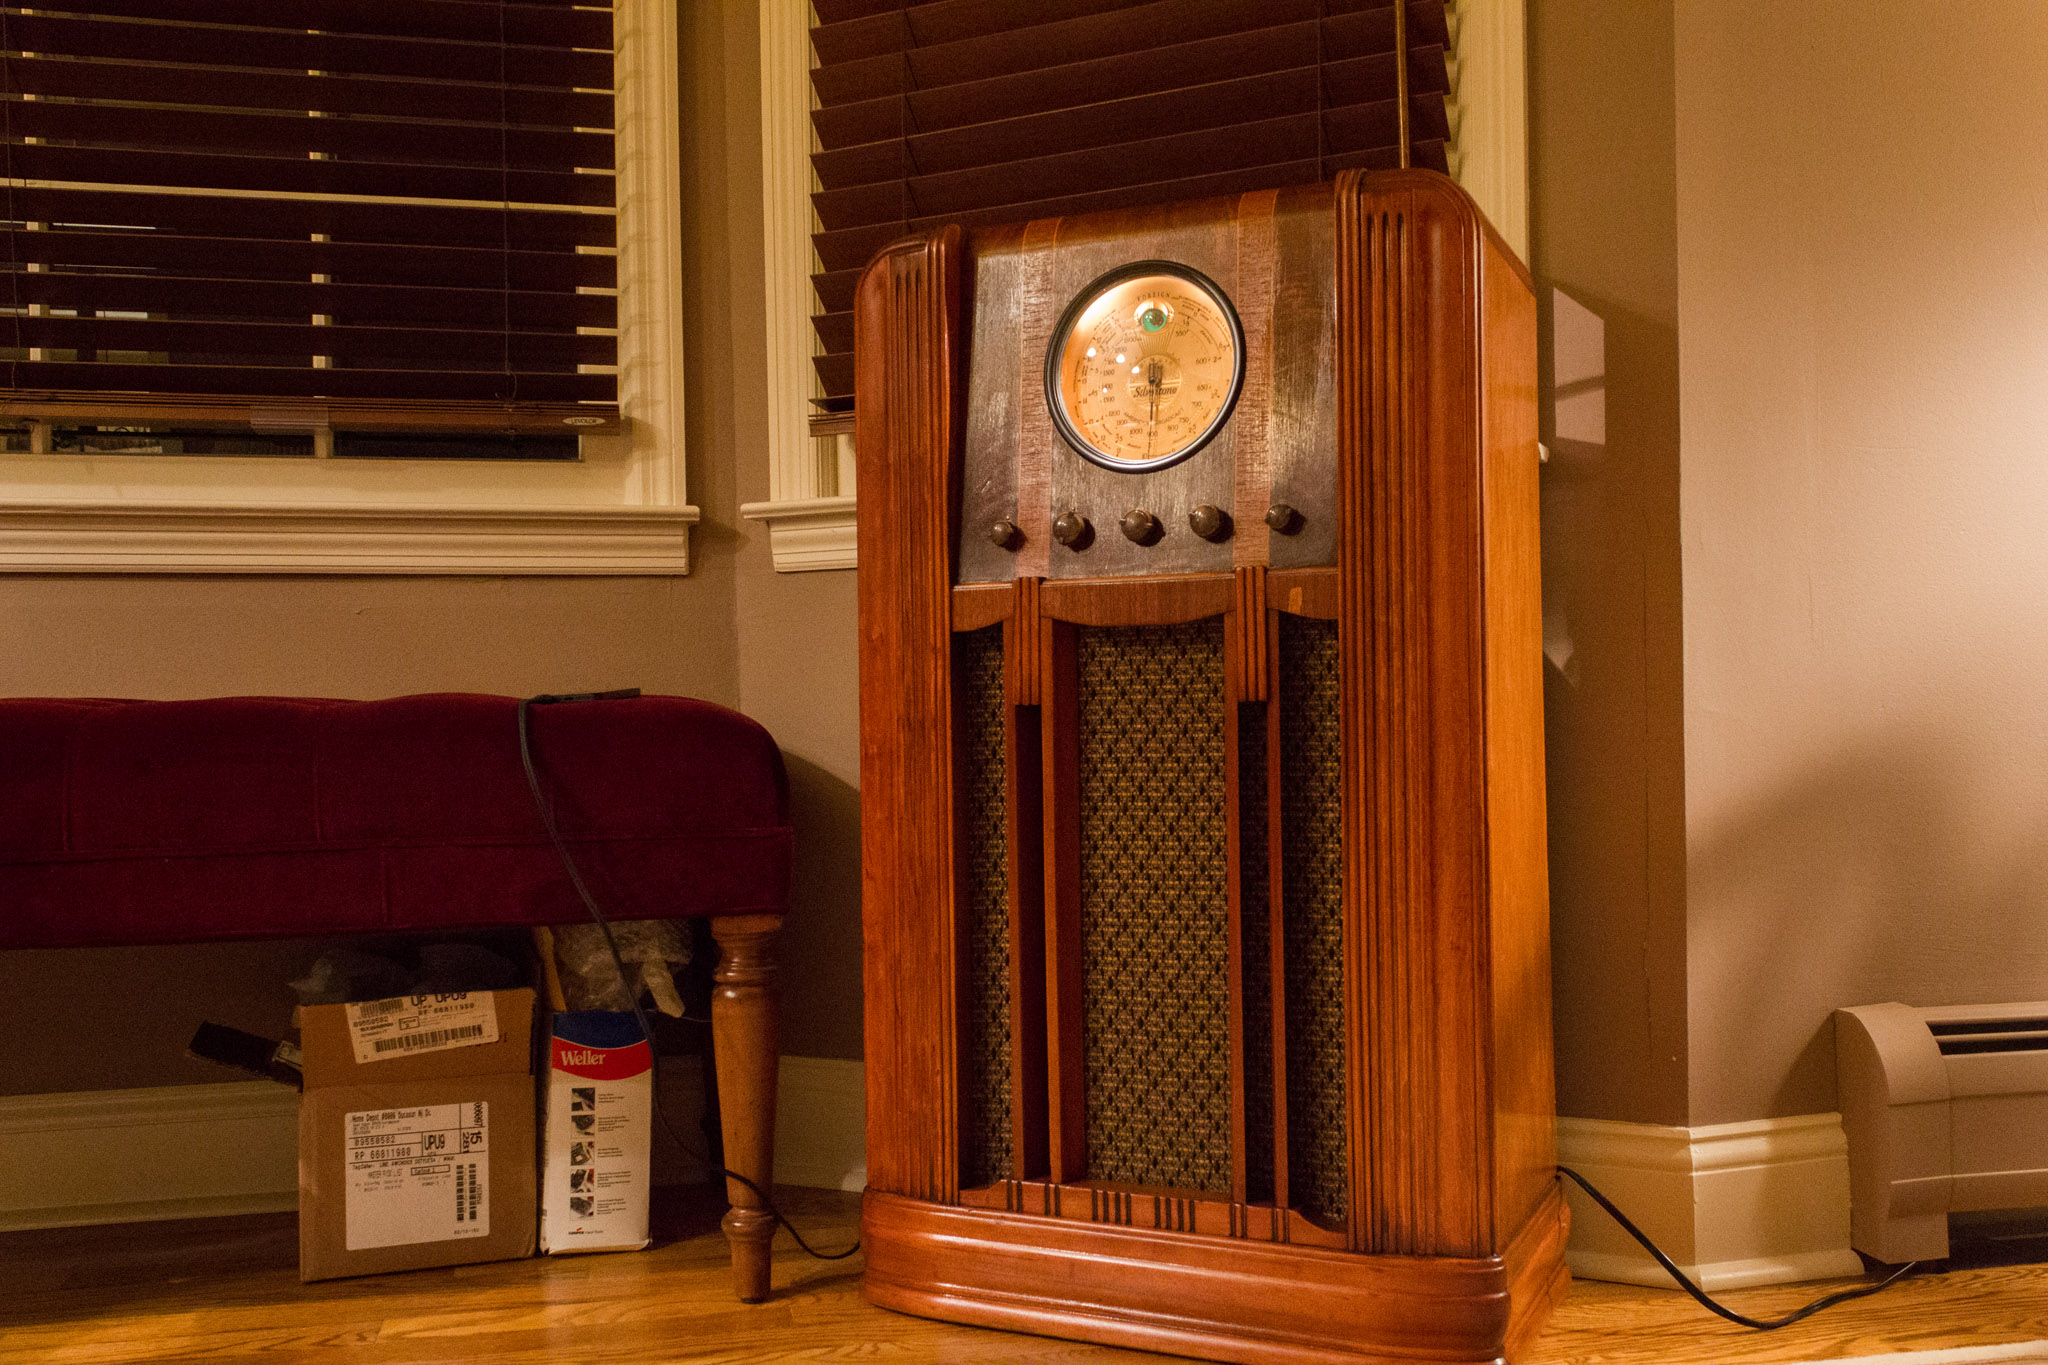
When I got home from Australia, I had plans to restore our old Sears Silvertone in the same way. Starting out was simple enough. Low hanging fruit included cleaning clumps of dirt and straw out from between the tubes (no exaggeration) and repairing a crack in the speaker cone. Then I was up against some hurdles since the radio wasn’t in a functional state. I searched around online to see where people recommended starting with the deep hum symptom. Immediately it became clear that the capacitors were the likely culprit. While most of the other elements of these old radios seem to hold up well, capacitors often fail over time.
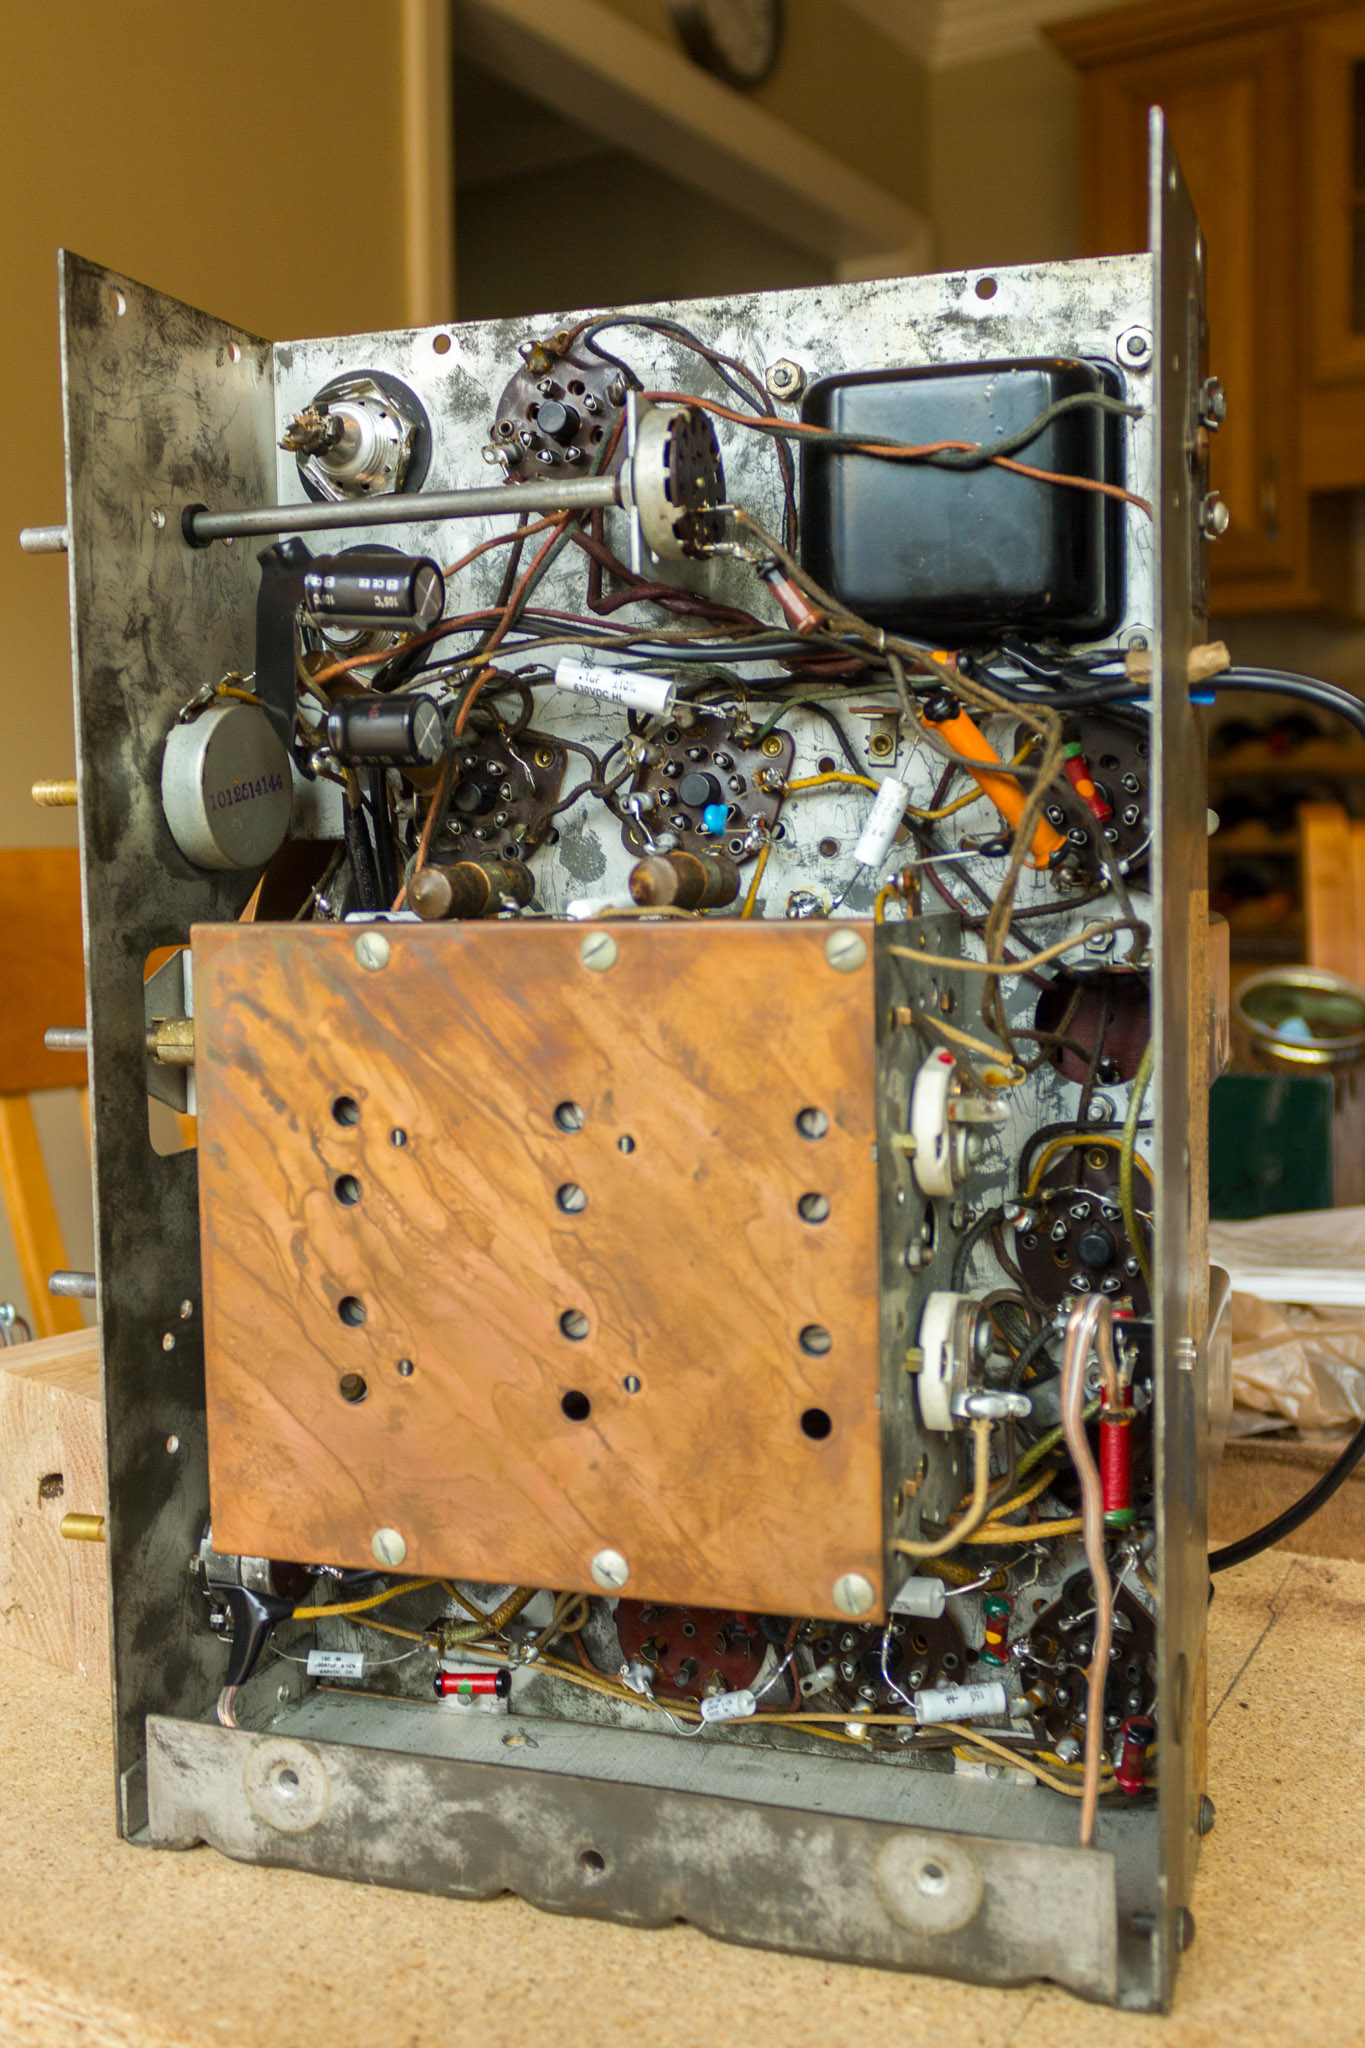
In the world of vintage radio restoration, people go to extensive lengths to hide the ‘recapping’ process, going as far as wrapping new capacitors in the skins of the vintage originals. I was a little less patient, happy to cut out the old parts and solder in modern equivalents from online electronic supply stores. The markings on the original capacitors were sometimes completely illegible due to the wear of time. Luckily for me, the manufacturers pasted an electrical diagram right on the side of the housing and I was able to track down replacements matching the original specifications. Additionally, there are loads of incredible articles like this one available to help illuminate mysteries along the way.
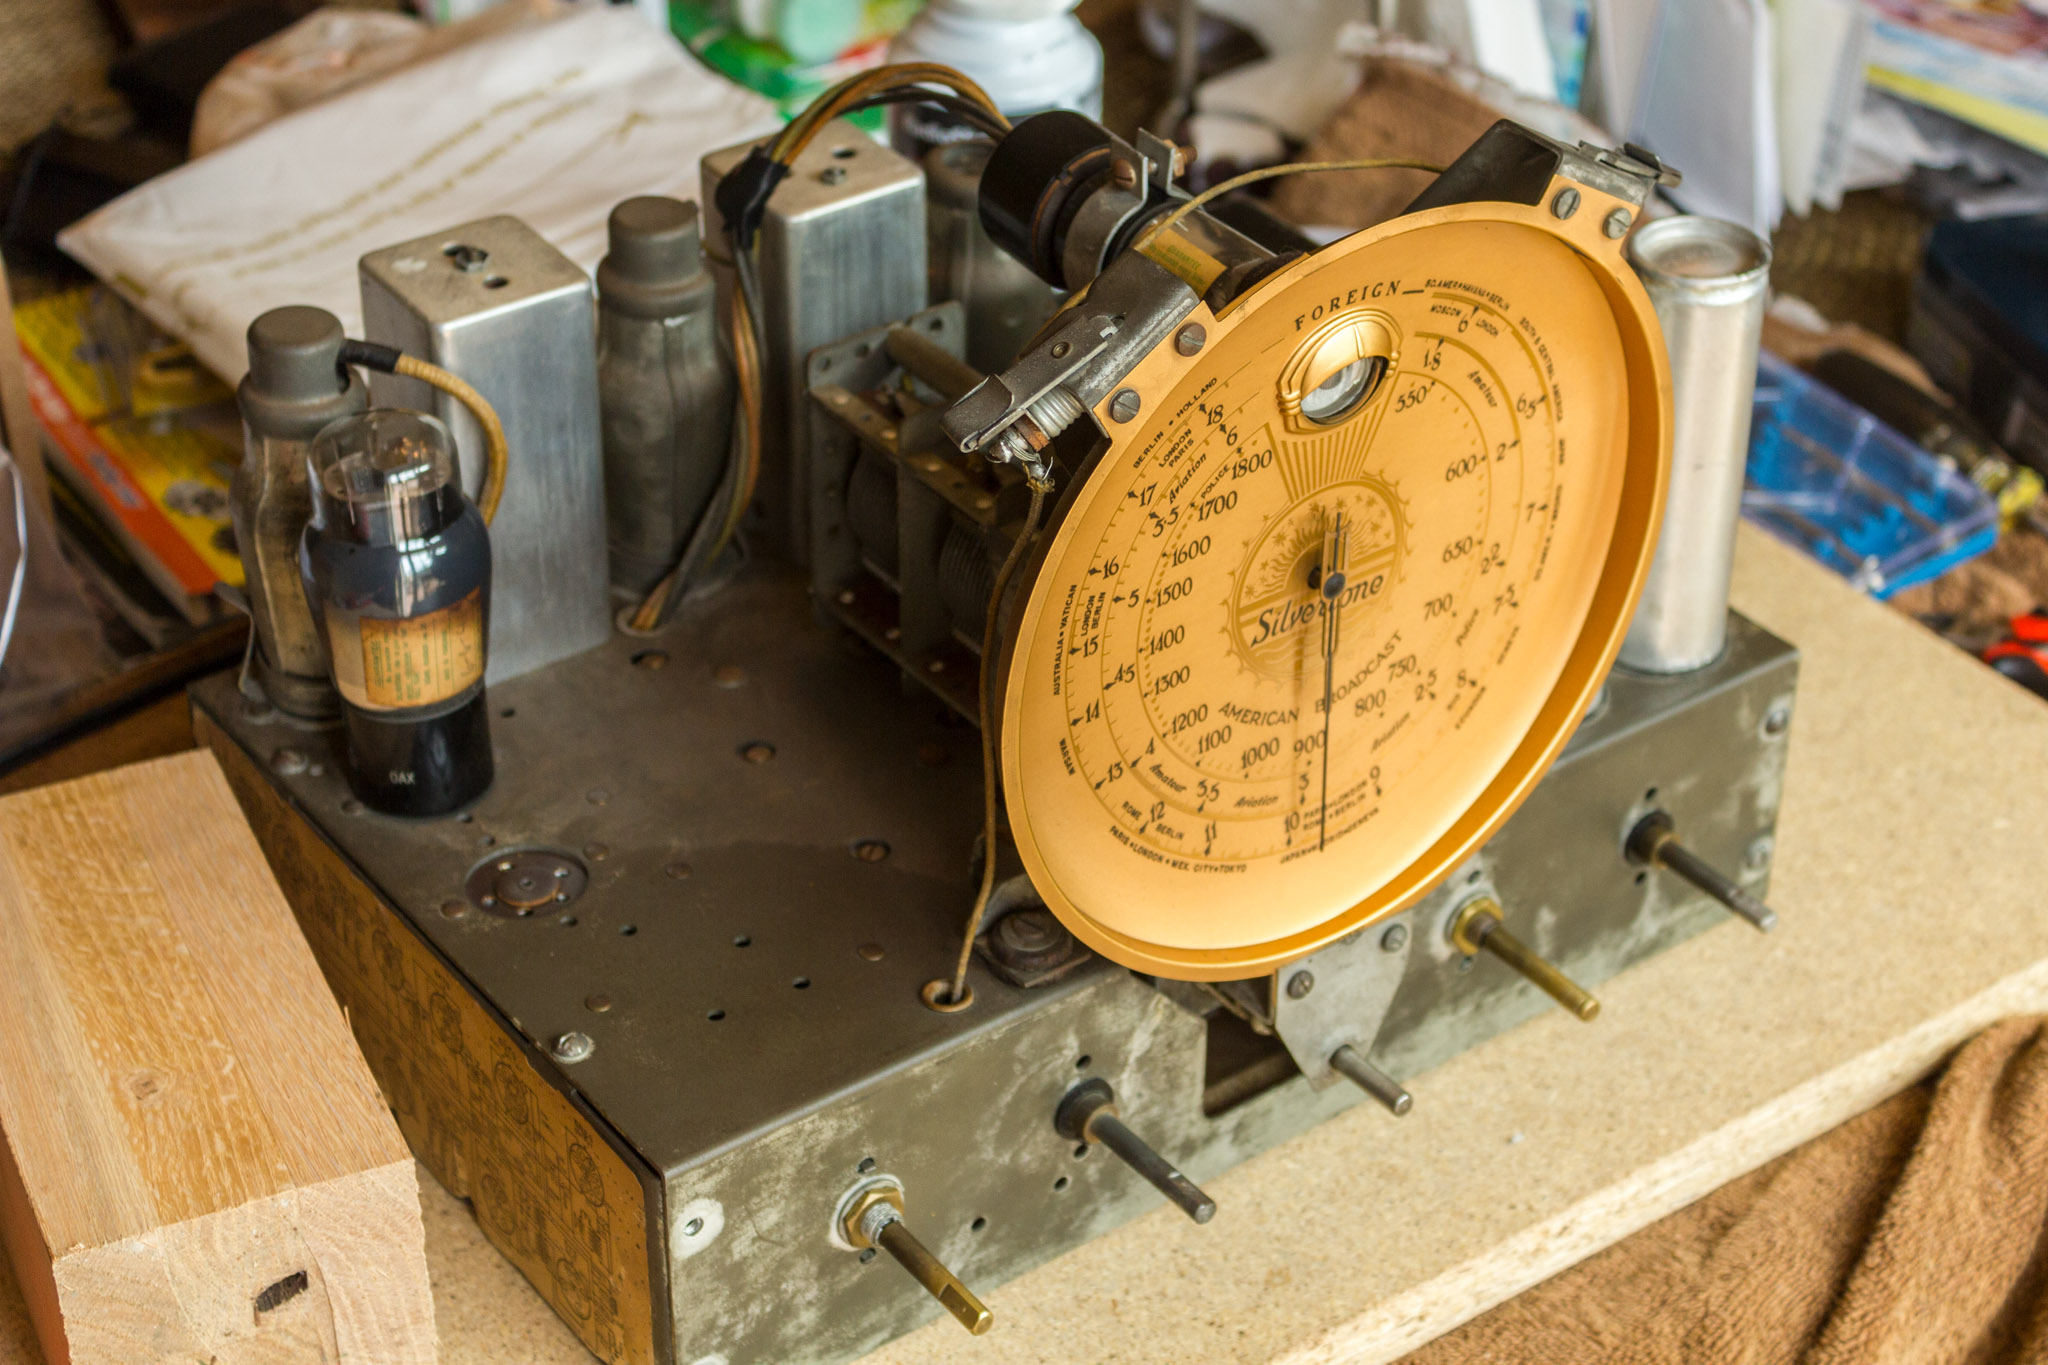
Seeing the underside of the housing for the first time was a little bit of a shock. The world before PCBs was easy to work with, if confusing. All of the bright white capacitors are the replacements. The two larger black capacitors in the top left of the image are the electrolytics replacing the functionality of the large cylinder capacitors on top of the case.
After replacing all the old capacitors, I swapped the power cord, and added the audio signal injection at the volume knob. Instead of completely circumventing the receiver components, I put in an audio bypass jack which overrides the radio receiver when external audio is plugged in, but otherwise reverts to the original antenna hardware which still works fine.
One of the tubes is mounted horizontally as the ‘magic eye’ on the dial to help with tuning. The electrical diagram is visible in the lower left.
I double checked all of my work against the diagram, and switched the radio on for the first time. I was very pleased that it didn’t burst into flames. After a moment of silence, the tubes warmed up and music came through the speaker sounding surprisingly crisp for 80 year old audio hardware.
After fixing up the electronics, I enlisted the help of my dad, Bruce, to guide me on sanding down and refinishing the housing. After its years of neglect and storage in barns, the wood finish had been totally destroyed. Bringing it down to bare wood, staining it, and putting on a fresh coat of sealant brought back the texture of its veneer designs.
Ultimately I didn’t need to replace any of the tubes. Three years of regular use and they still seem to be going strong. One of them has a note on it marking that it was replaced in 1952 and guaranteed to be good for two years.
Sometimes you just have to completely revamp your online portfolio.
It’s always sad to see the old one go, having been nurtured lovingly through the years. But you get to a certain point where it just doesn’t play well with new technologies like mobile devices and high DPI displays. Having been extended so far beyond it’s original design, it makes more sense to scrap the whole show and start over.